Mobilinkd (http://www.mobilinkd.com) is the producer of very compact and capable bluetooth enabled KISS mode TNCs that are used with APRS applications on Android, iOS, Windows, and Linux, and Mac OS.
Their original prototype was built using the Arduino platform.
On their website, they provide breadboard descriptions of various TNC designs including an Arduino based KISS TNC: http://www.mobilinkd.com/2014/09/11/arduino-kiss-tnc/
Having a few spare Arduino boards lying around, I though it would be fun to build one.
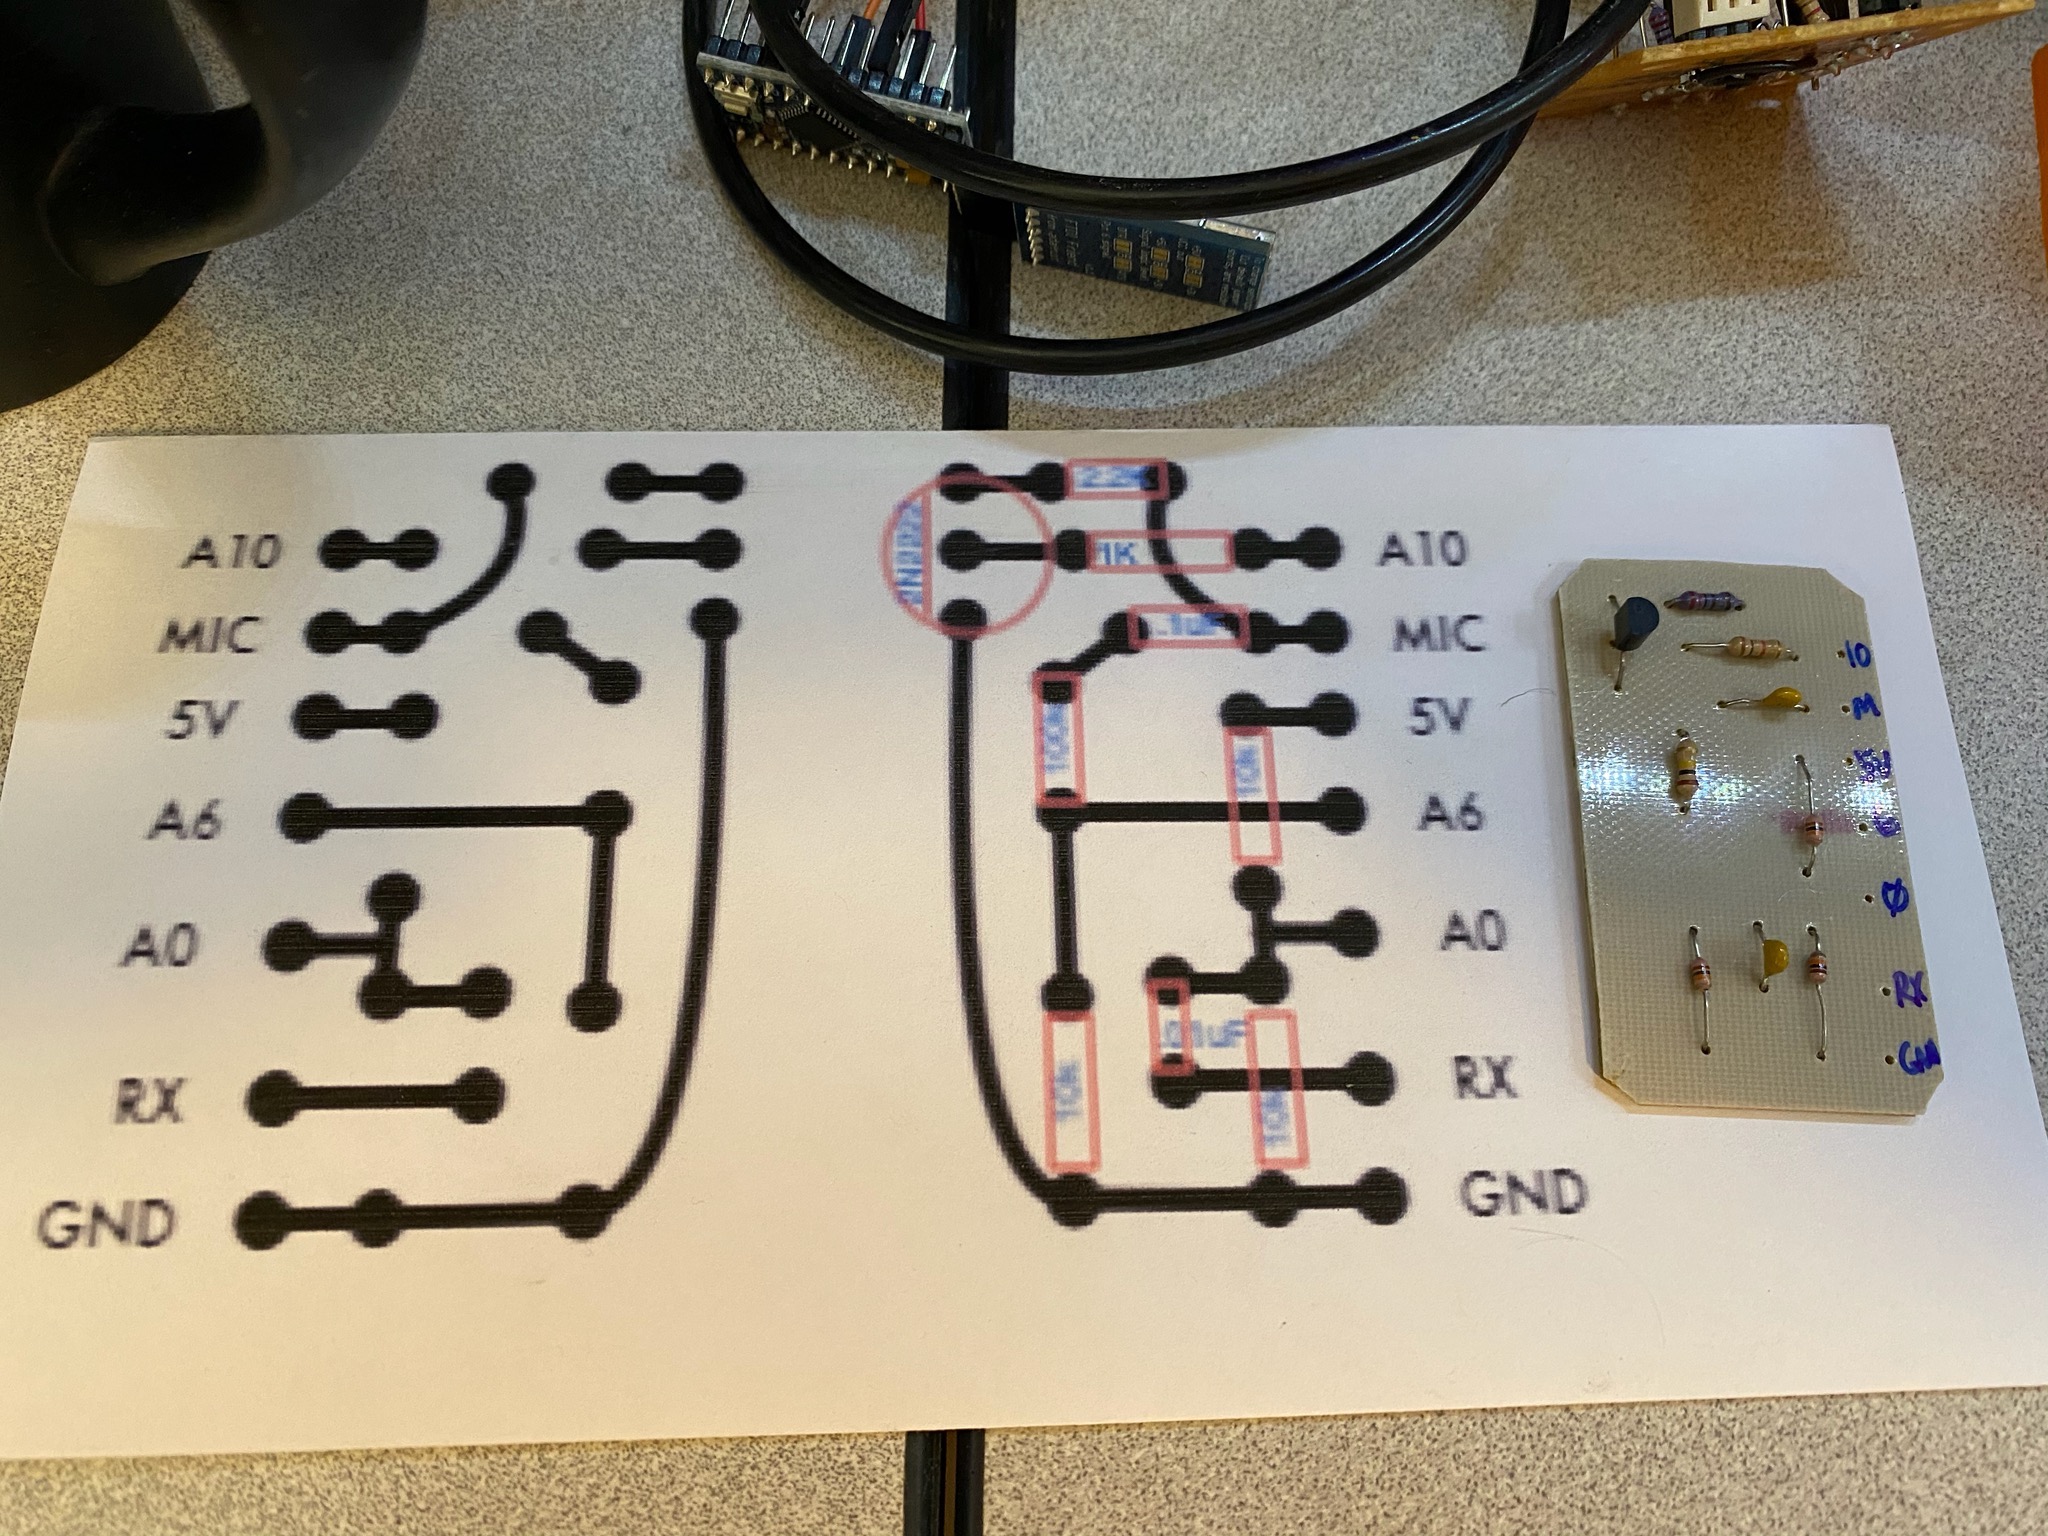
First I drew a schematic based on their breadboard design using iCircuit:

Then I built the simple circuit on a Radio Shack prototype DIP IC circuit board that I had on hand:
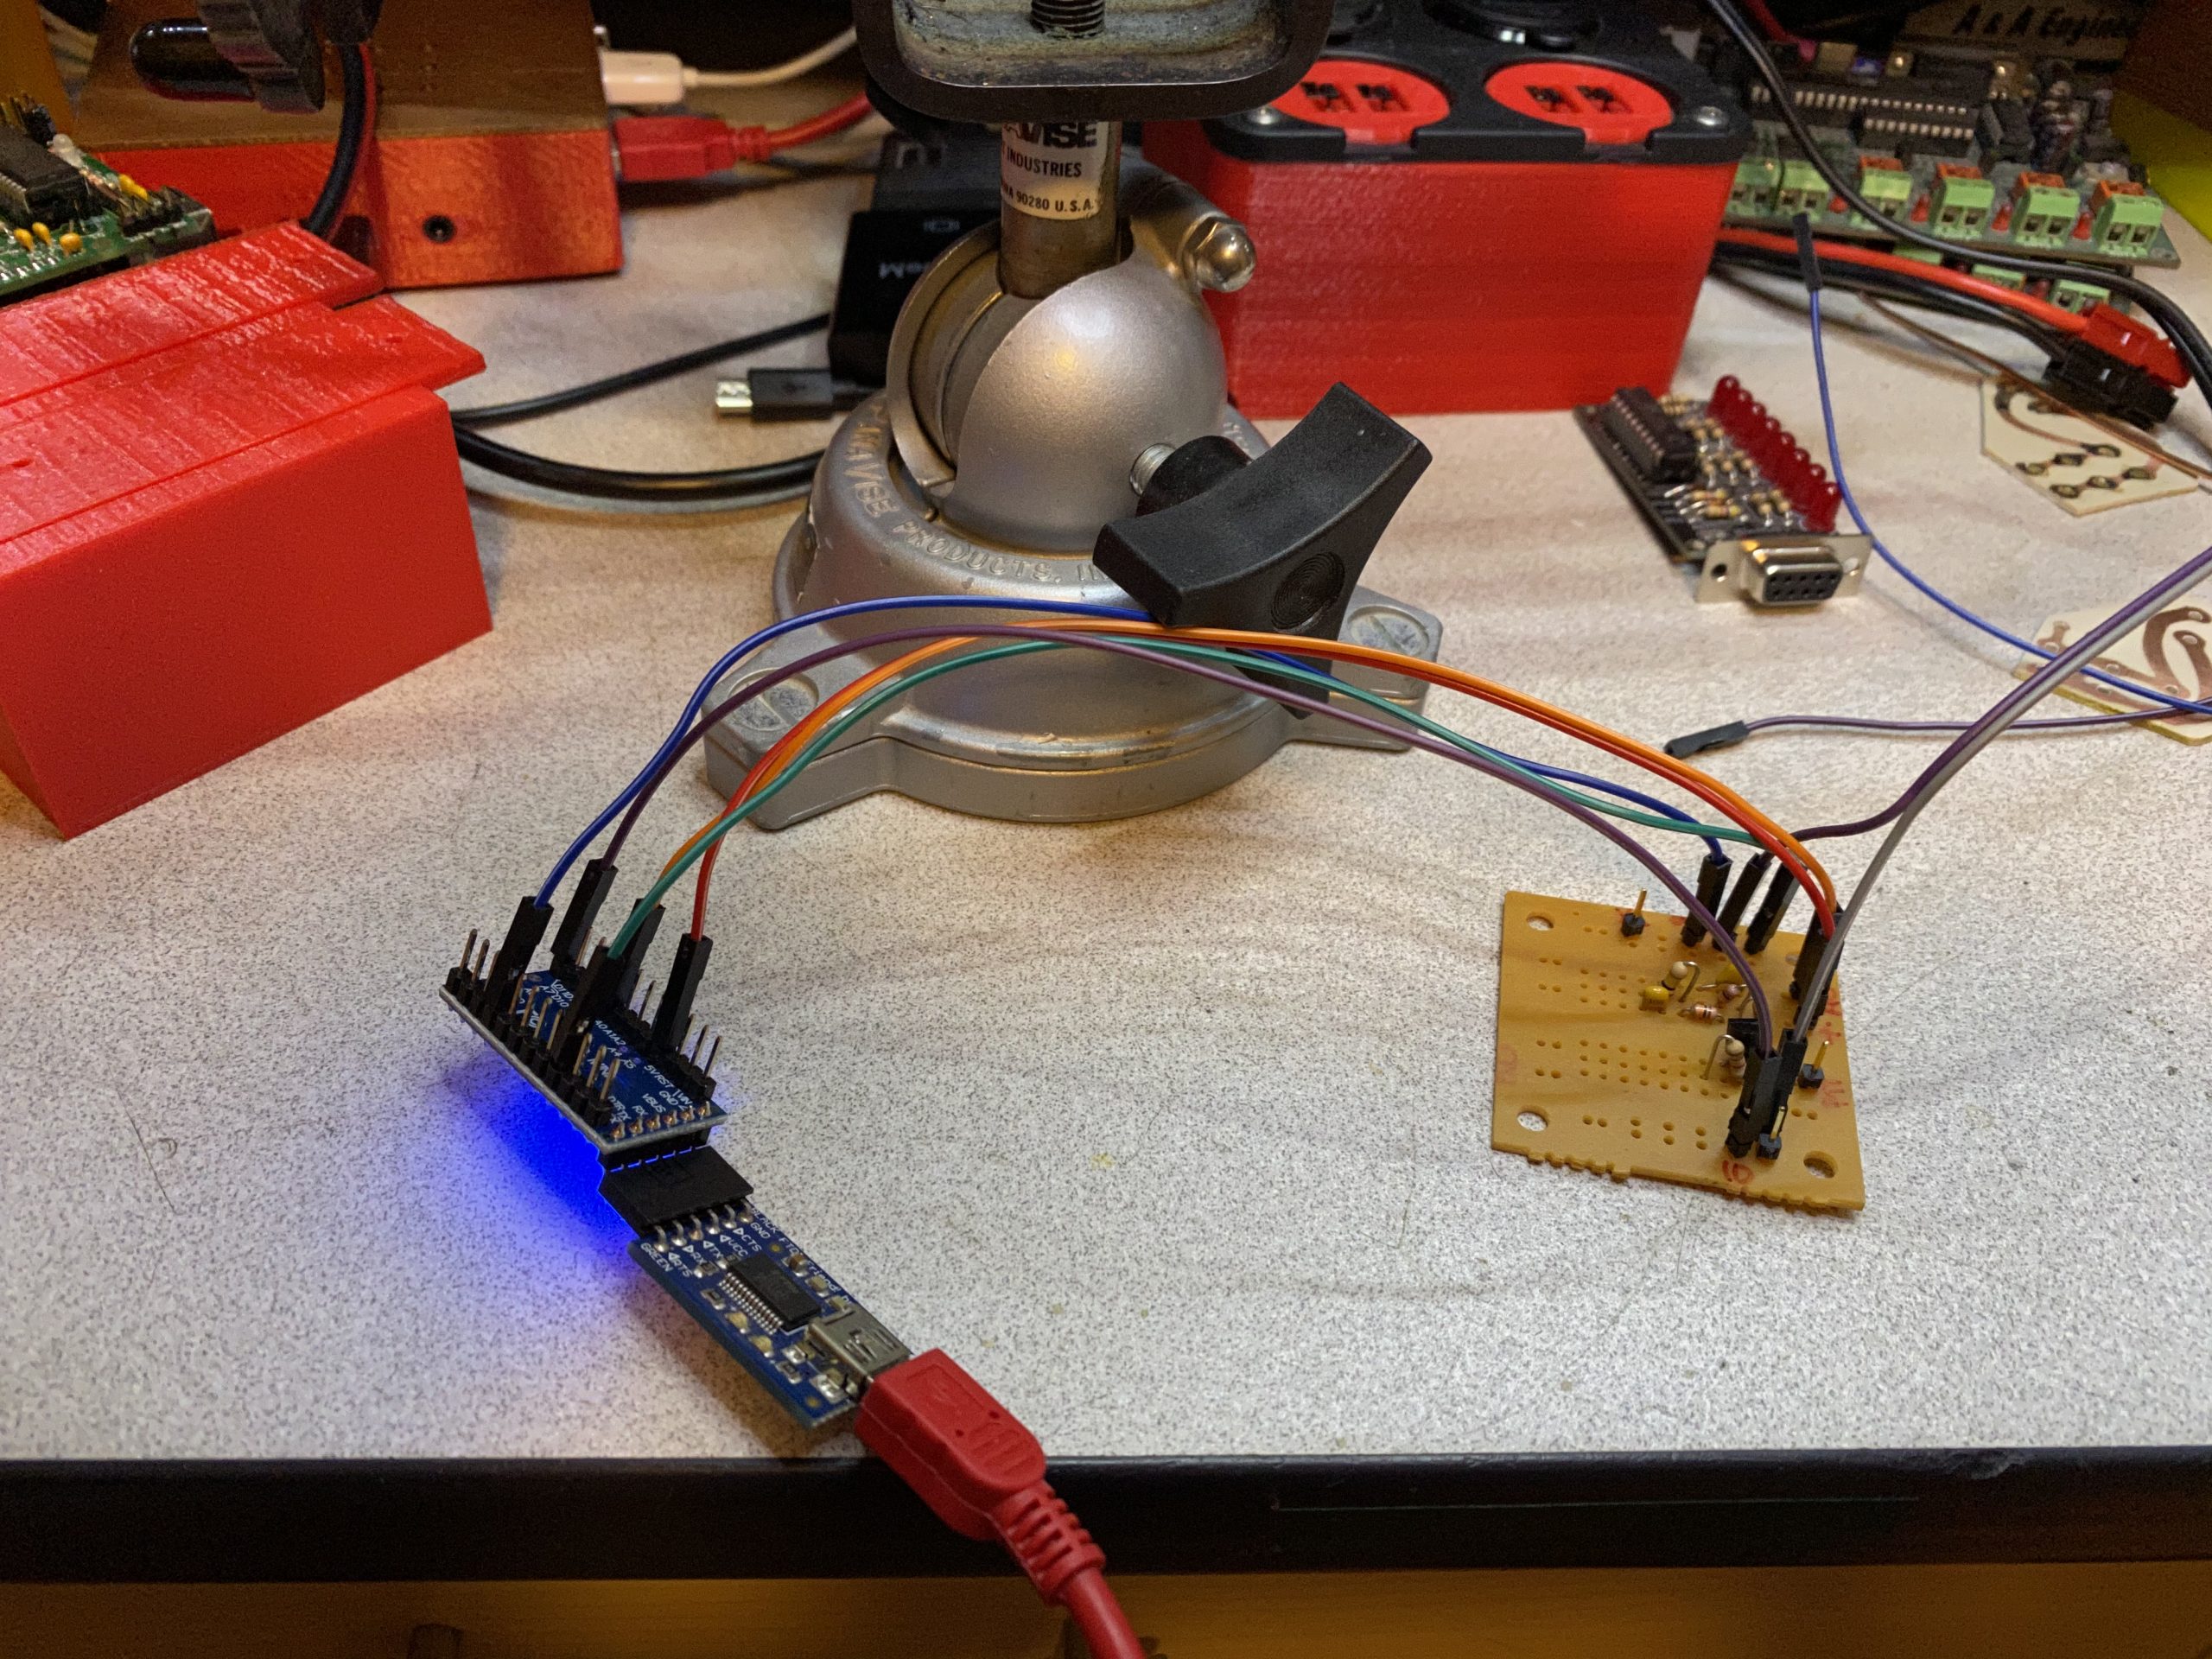
Mobilinkd provides the firmware for the project in the form of a HEX file that can be uploaded to the Arduino using “avrdude”. I used a Raspberry Pi 3 to flash the firmware onto the Arduino board.
I connected the finished KISS TNC to an Icom IC-91AD via the Speaker/Mic jack (RX/TX+PTT). I used the same Raspberry Pi 3 to test the KISS mode TNC using the AX25 utilities kissattach and axlisten:
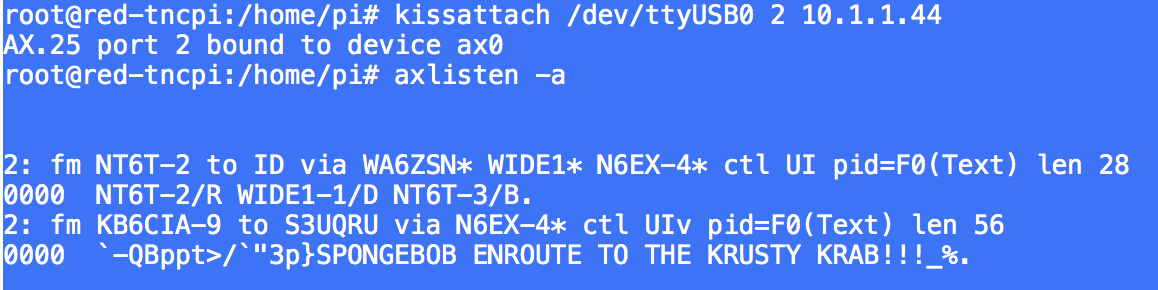
It worked right off the bat! Next, I configured the Java based “Yet Another APRS Client” (YAAC) software on the Raspberry Pi computer to use the new KISS mode TNC. That worked right off the bat also.

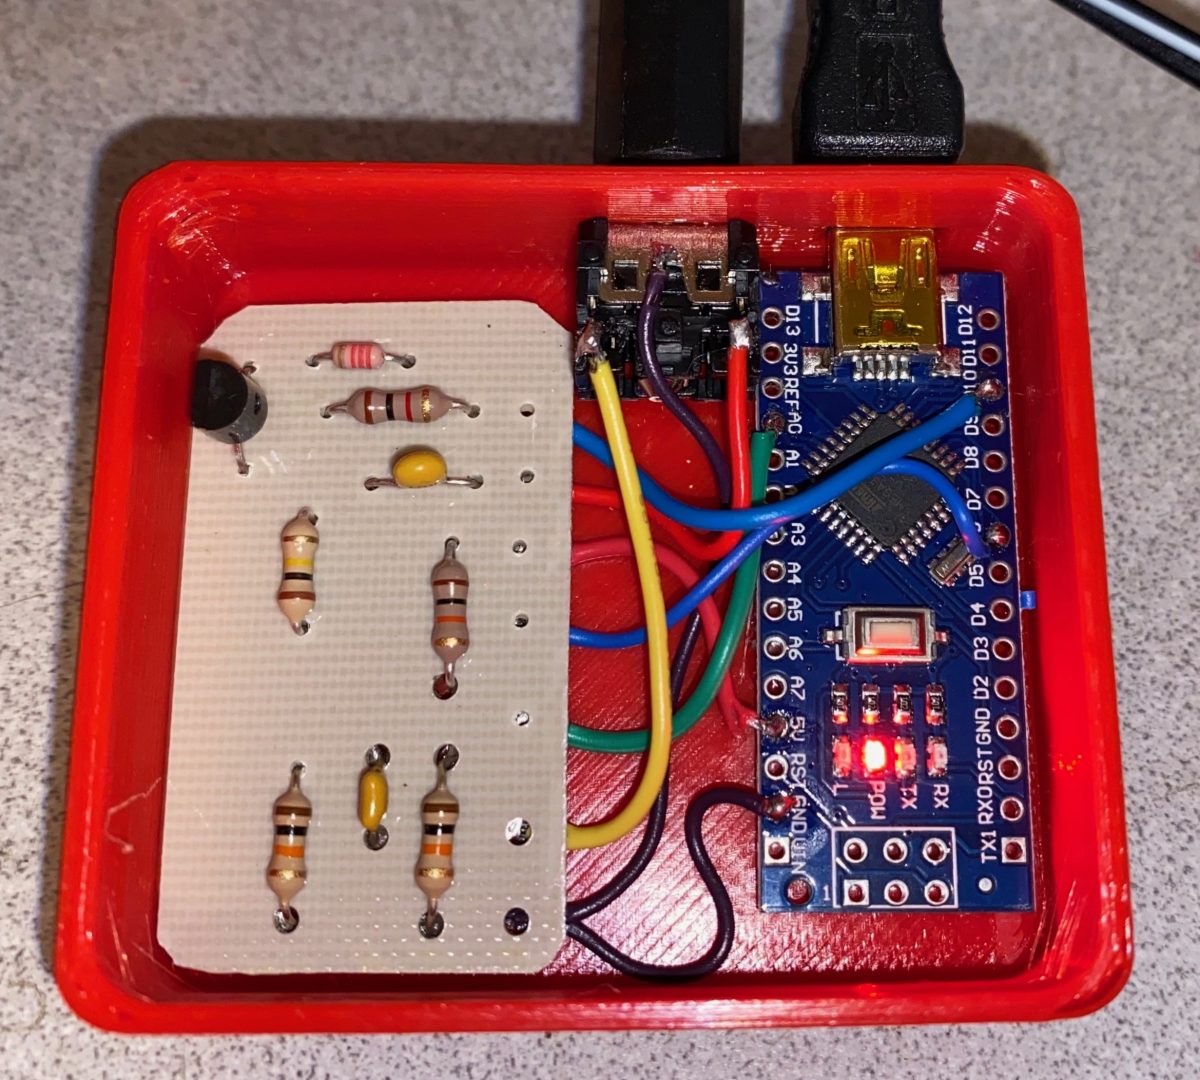
To build a more permanent interface board, I drew up a PCB design using OmniGraffle Pro. I saved that as a JPEG and then used my Cricut (pronounced “Cricket”) die cut machine to cut the design out of vinyl. I wasn’t sure the vinyl would hold up to the PCB etching process, but it did! I used a Dremel drill press to drill the circuit board holes.

Lastly, I designed a custom 3D enclosure. I wanted it to be as small as possible, so instead of building in circuit board stand-offs, I simply used hot glue to fix the boards to the case.
Later I’ll try to figure out a clever snap-in design for the Arduino board and will probably use stand-offs for the interface board. The interface board can be scaled down to make it smaller. I’m also thinking about adding solder pads for my standard TX+PTT/RX 3.5mm stereo jack to the PCB.


Using the Cricut cutter software, it was easy to scale the PCB etch pattern down. Since I’m using through-hole parts without critical dimensions like resistors and transistors, I don’t have to worry too much about the parts fitting the new spacing.
I made a smaller version of the interface PCB. However, I forgot that I had the larger PCB drill installed in my Dremel drill press that I used for a PowerPole circuit board project, so some of the through-holes were drilled too large.
Here’s a comparison of my original board (right) and my new scaled-down board (left)

The new board is much closer to the size of the Arduino Nano board that runs the KISS firmware. The first enclosure was 70 x 70mm square. The new one is 60mm x 52mm.

Leave a Reply