I’m not sure what you might want to call it, but my goal was to learn what the component parts of the very popular suite of Digital Voice applications that make up “Pi-Star” were, and how they interacted with each other. I wanted to use non-Raspberry Pi hardware since Raspberry Pi hardware is scarce and expensive right now.
I found a board called the Libre Computer AML-S905X-CC single board computer nicknamed “Le Potato“. It was only $35 at Amazon, so naturally I bought two of them.
Le Potato features the same exact form factor as the Raspberry Pi 2/3 single board computers, Quad 64-bit Low Power Cores, and 2GB of RAM. I was able to reuse the Pi3 case I had designed a long time ago.
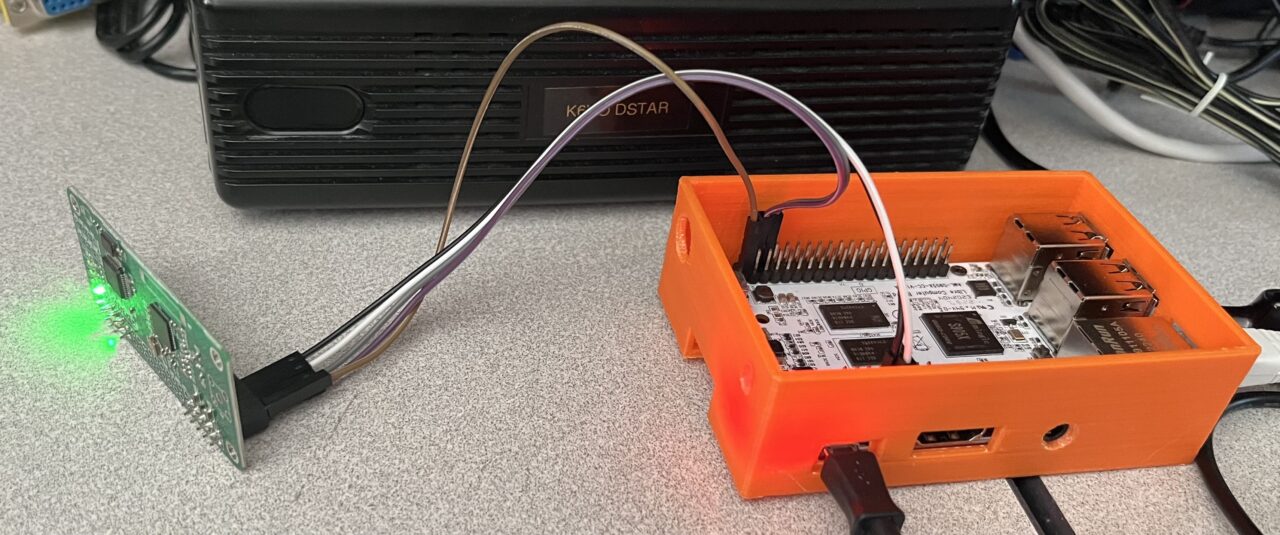
The first thing I wanted to get running was the MMDVM hardware and the application that talks to it, MMDVMHost by G4KLX. Libre Computer offers a wide variety of operating system images that you can download onto an SD card that will work with the Le Potato hardware. I chose the Raspios variant of Debian since that is what runs on the Raspberry Pi SBCs that I am very familiar with. I used jumper wires to connect an expendable “Jumbospot” Zumspot clone board to the Le Potato UART pins (which are separate from the GPIO pins normally found on a raspberry pi). More on how I used a device overlay to allow me to directly plug in a Zumspot board to the GPIO headers later.
On the newer version of Raspios, there is no default “pi” user with a known password so you have to create a configuration file named “userconf.txt” with “username:password” in the /boot directory after you burn the image. The password is encrypted using “openssl passwd -6” on a linux system. You need to create a blank “ssh” file in /boot to enable the ssh daemon.
There is no Wifi on the LePotato board, but the operating system supports USB Wifi dongles and you can create the wpa_supplicant.conf file in the boot directory and it will be configured for you.
Now that I have a system that I can ssh into, I first updated the operating system and installed some packages I normally install, along with the “wxWidgets Cross-platform C++ GUI toolkit” which is used by the MMDVMHost and other Digital Voice applications.
apt-get update && apt-get -y upgrade
reboot
# Once rebooted, I installed some packages:
sudo apt-get -y install iftop emacs tcpdump libwxgtk3.0-gtk3
The next thing I needed to do was to get the MMDVMHost application installed, configured, and running on my Potato system.
git clone https://github.com/g4klx/MMDVMHost.git
cd MMDVMHost
make
sudo make install
To enable the mmdvm software to talk to the modem, I created an mmdvm user (without a login shell) and added it to the “dialout” group which will own the device /dev/ttyAML6
groupadd mmdvm
useradd mmdvm -g mmdvm -s /sbin/nologin
usermod mmdvm -G dialout
Compiling MMDVMHost took a very long time but there were no fatal errors and everything looked good.
To test, I copied the /etc/mmdvmhost configuration file from a working Pi-Star hotspot over as /etc/MMDVM.ini This is the default configuration filename when building the software. I had to update the “Port” parameter to /dev/ttyAML0 for the MMDVM modem device.
Running “MMDVMHost &” forked the application into the background and the modem came to life! My transmissions were recorded in the log! This gave me the incentive to carry on and install the D-STAR application, ircDDBGateway.
I was really excited to get D-STAR working, but first I wanted to get the modem board installed on the GPIO interface header where it belongs. To do that, I would have to enable another UART (universal asynchronous receiver/transmitter) port on the Le Potato board. Libre Computer luckily provides an easy way to do that with device overlays. To make a long story short, I was able to install a package they provide called “libretech wiring tool” and a program called “ldto” to merge “uart-a” onto the device tree. This created /dev/ttyAML6 on the GPIO hardware pins where the mmdvm hotspot boards require them to be.
Once I was able to plug the “jumbospot” board into the GPIO header pins and update MMDVM.ini with the new port designation I noticed something strange.
The first thing MMDVMHost does when it starts up is establish communication with the hotspot board. Sometimes it would not work and I had to reset the modem board before it would communicate. I had to unplug the board and plug it back in to reset it.
Later, I figured out that there was a way to reset the mmdvm hardware through GPIO pins. Once I figured out the different GPIO pin designations on the Potato board and how to tell the pins to be high or low, I was able to script a software reset procedure that effectively reset the modem. At this point, I switched to a ZumSpot board and I no longer had to reset the modem board for it to communicate. I still have my script, just in case.

Somewhere along the line, I thought about installing a display. OLED displays use either an I2C interface or an SPI interface. I wasn’t sure if the MMDVMHost software included support directly, or if I had to compile additional libraries. It turned out I had to compile additional libraries and also had another device tree overlay to be able to talk to the OLED display. I spent quite a bit of time on this, but never got it to work. The OLED display ended up on a different port than the software was expecting.
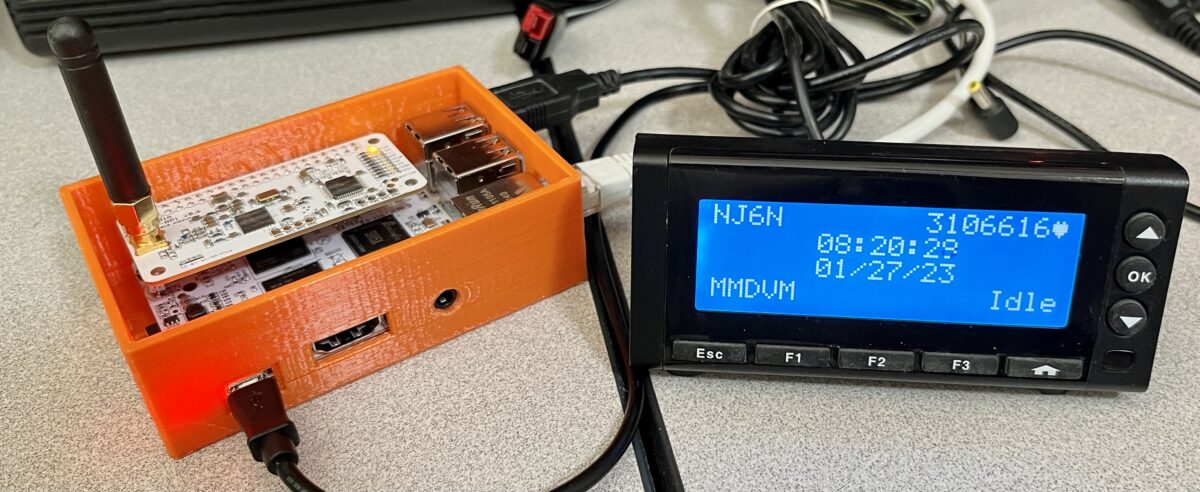
I noticed there was an option for “LCDProc” which I was familiar with from using them on mini-ITX linux boxes many years ago. I dug out my USB LCDproc display, installed the necessary software to make it work and to my amazement, it worked great! At some point I’d like to get the buttons configured to navigate to different reflectors, etc.
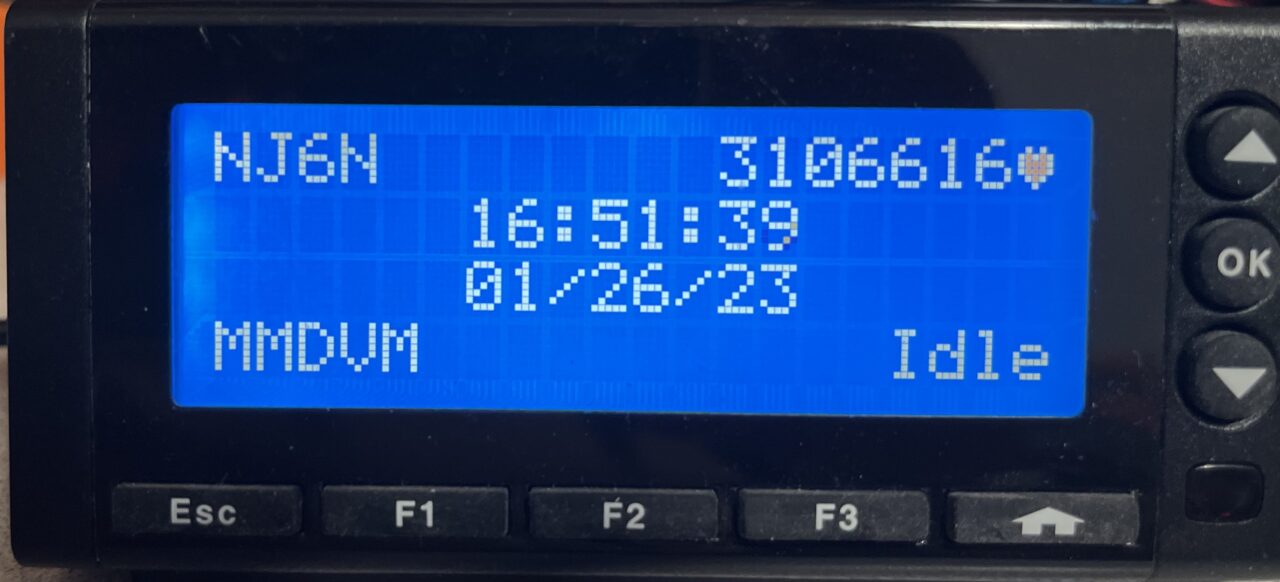
So that MMDVMHost would start when the system booted, I created a SystemD service for it. Now it starts at startup and I can control it with systemctl
To provide D-STAR support, I compiled, installed, and configured ircDDBGateway. Again I used my configuration file from a working Pi-Star hotspot to get it up and running quickly. I found a problem with my configuration that created an obscure error in the logs. I found the point in the code where that error was being produced and added more logging information that led me to figure out that I was missing a configuration directive. Oddly, the same entry was missing from my Pi-Star hotspot configuration. A friend helped me figure out what was missing (ircddbHostname2):
ircddbHostname=ircv4.openquad.net
ircddbHostname2=group1-irc.ircddb.net
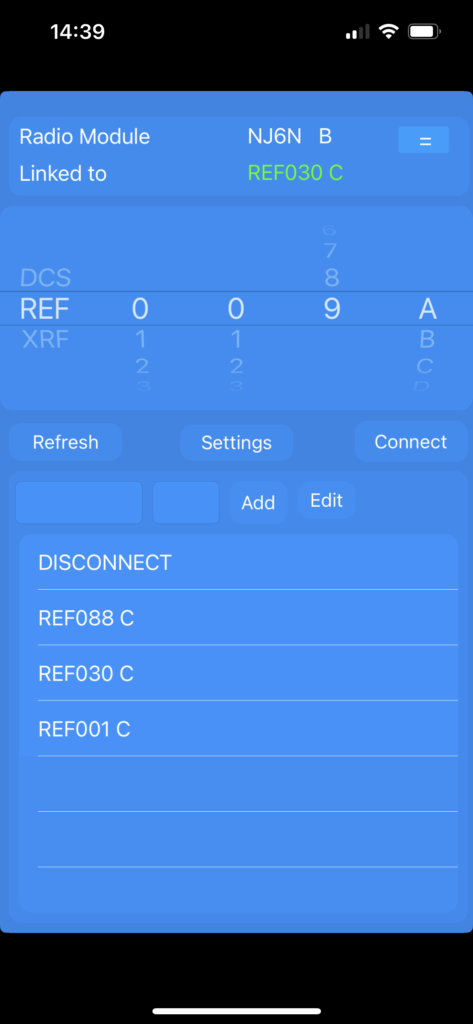
Once I had D-STAR working, I wanted to figure out how to control what the hotspot was connected to. DTMF linking commands from a transceiver worked great, and I had set a default connection of “REF088C” but I wanted to be able to control the connection through software.
I figured out that this was done through an application called “remotecontrold”. This talks to ircDDBgateway and tells it to link or unlink per your command. For example:
remotecontrold "NJ6N B" link never "REF088 C"
The configuration block in the ircDDBGateway configuration file enables the remote control feature:
remoteEnabled=1
remotePassword=raspberry
remotePort=10022
The configuration settings for the “remotecontrold” application are configured in a hidden file that’s located in your home directory (e.g. /root if you’re logged in as root) called “.Remote Control” that contains the following configuration directives:
address=127.0.0.1
port=10022
password=raspberry
windowX=0
windowY=0
Note: you should change both passwords to something more secure.
The configuration block in the ircDDBGateway configuration file also enables you to use the “ircddb remote” application:
At this point I decided to add support for Yaesu System Fusion. I downloaded, compiled, installed and configured YSFGateway from source using the same method as for ircDDBGateway. Everything compiled cleanly and works fine.
I started to investigate the Pi-Star web pages and how I might install that as well but it is more complicated than I’d like so I will probably write my own front-end to my SweetPotatoPi (a name suggested by Ed, WA6ED).
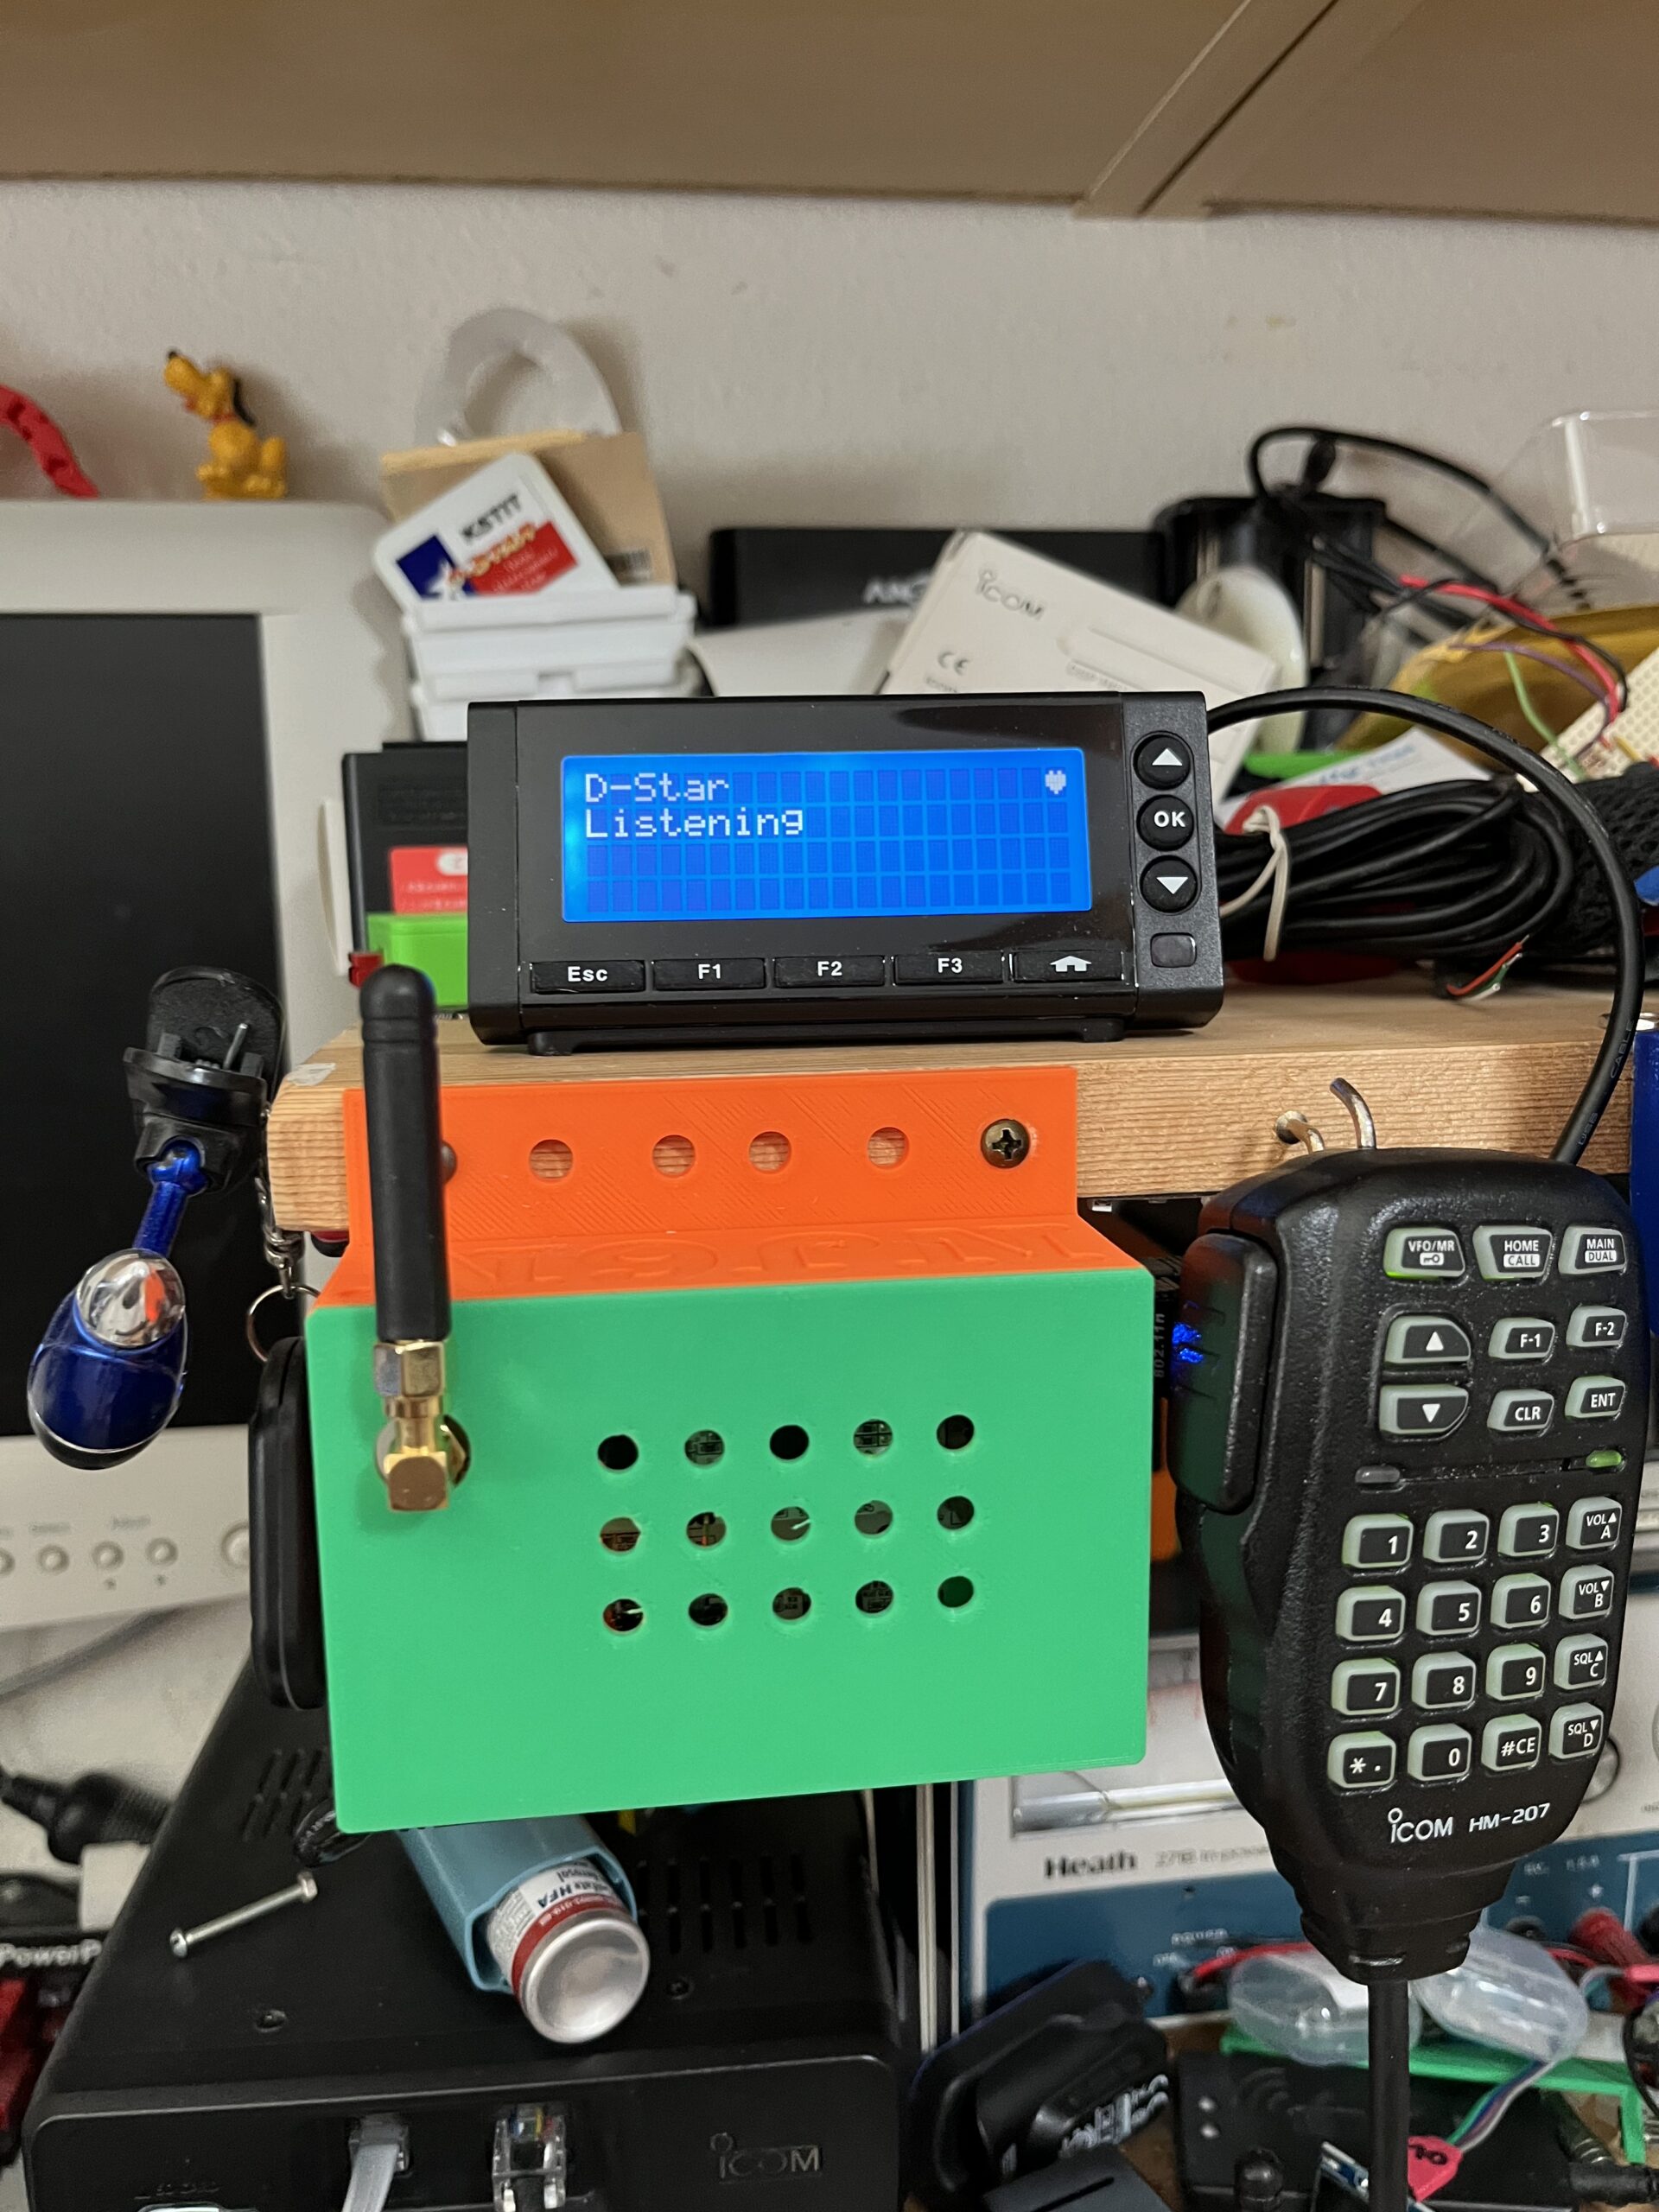
The final product, a SweetPotatoPi hotspot with LCDProc display.
One of the last things to do was to design a lid that has a port for the hotspot Antenna. My Pi3 case has a tab that can be used to mount it on a standard 19″ relay rack panel. (Do they call them relay racks anymore?!)
Leave a Reply